Like popping your first wheelie or having a serious session on a race track, getting some decent shots of your beloved two-wheeled machine is something every motorcyclist should do at least once. Sure, if you’re cashed up enough, there’s an army of photographers out there with the experience and skills to do it for you. But what about the option of doing it yourself?
And yes, you’ve probably tried before—and maybe the shots looked like shit. We’ve all been there and done that. “Why don’t they look like the photos I see on Instagram?”
So here’s what I’m gonna do. I’m gonna walk you through the exact process you’ll need to get pro-quality shots. And better yet, I’ll explain how to get them printed out and up on the wall of your man/woman/person cave.
Think about it. Your bike in real life. And behind it, a killer shot of the same machine that looks like a pro motorcycle photographer took it. You in? Let’s do this.
Our Guide to Taking Badass Bike Pics
Before the Shoot
Let’s talk gear. Thankfully, this won’t require you to spend any money if you don’t want to. In fact, the only cash you’ll absolutely need to outlay in this whole process is for the prints. But I’m getting ahead of myself.
For this exercise, you’ll need a DSLR camera with manual settings. If you don’t have one, I guarantee you that your folks or friends will. They are bloody everywhere, so I’d ask around before buying your own Nikon (although if you want to spend the money, that’s certainly an option).
But whatever you do, do not use your phone. I know Apple likes to tell you how pro photographers and filmmakers use them every day. They don’t—at least, not for shots like these. iPhone shots suck for kickass motorcycle photography.
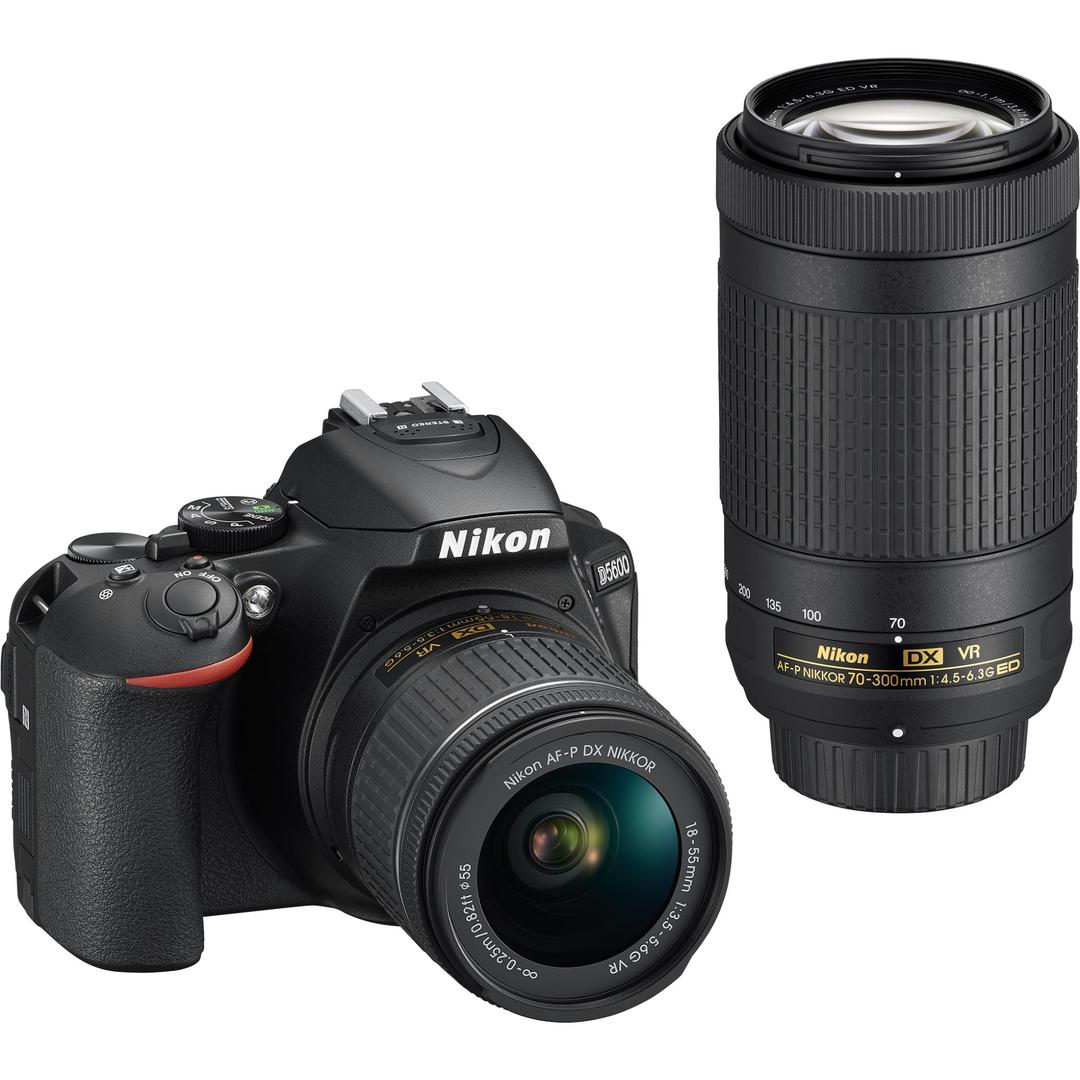
Once you have the camera in your sweaty little hands, you’ll need to figure out how to get it shooting in manual mode—but with auto focus turned on. Specifically, you’ll want it set to the lowest f-stop number it can manage.
When you hear photographers talking about ‘f16’ and ‘f2’, this is what they mean. You want to get it at f2 or so.
A good tip here is to consult the camera’s manual as to how you set ‘aperture priority’ mode. This is where you can manually set the camera’s f-stop and adjust other variables like shutter speed, white balance and ISO do their own automatic business without you having to worry.
While we’re at it, make sure you change the format of the photos the camera will take to RAW files and that it is shooting images as large as possible. Think 4000 pixels wide or thereabouts—it will help later on.
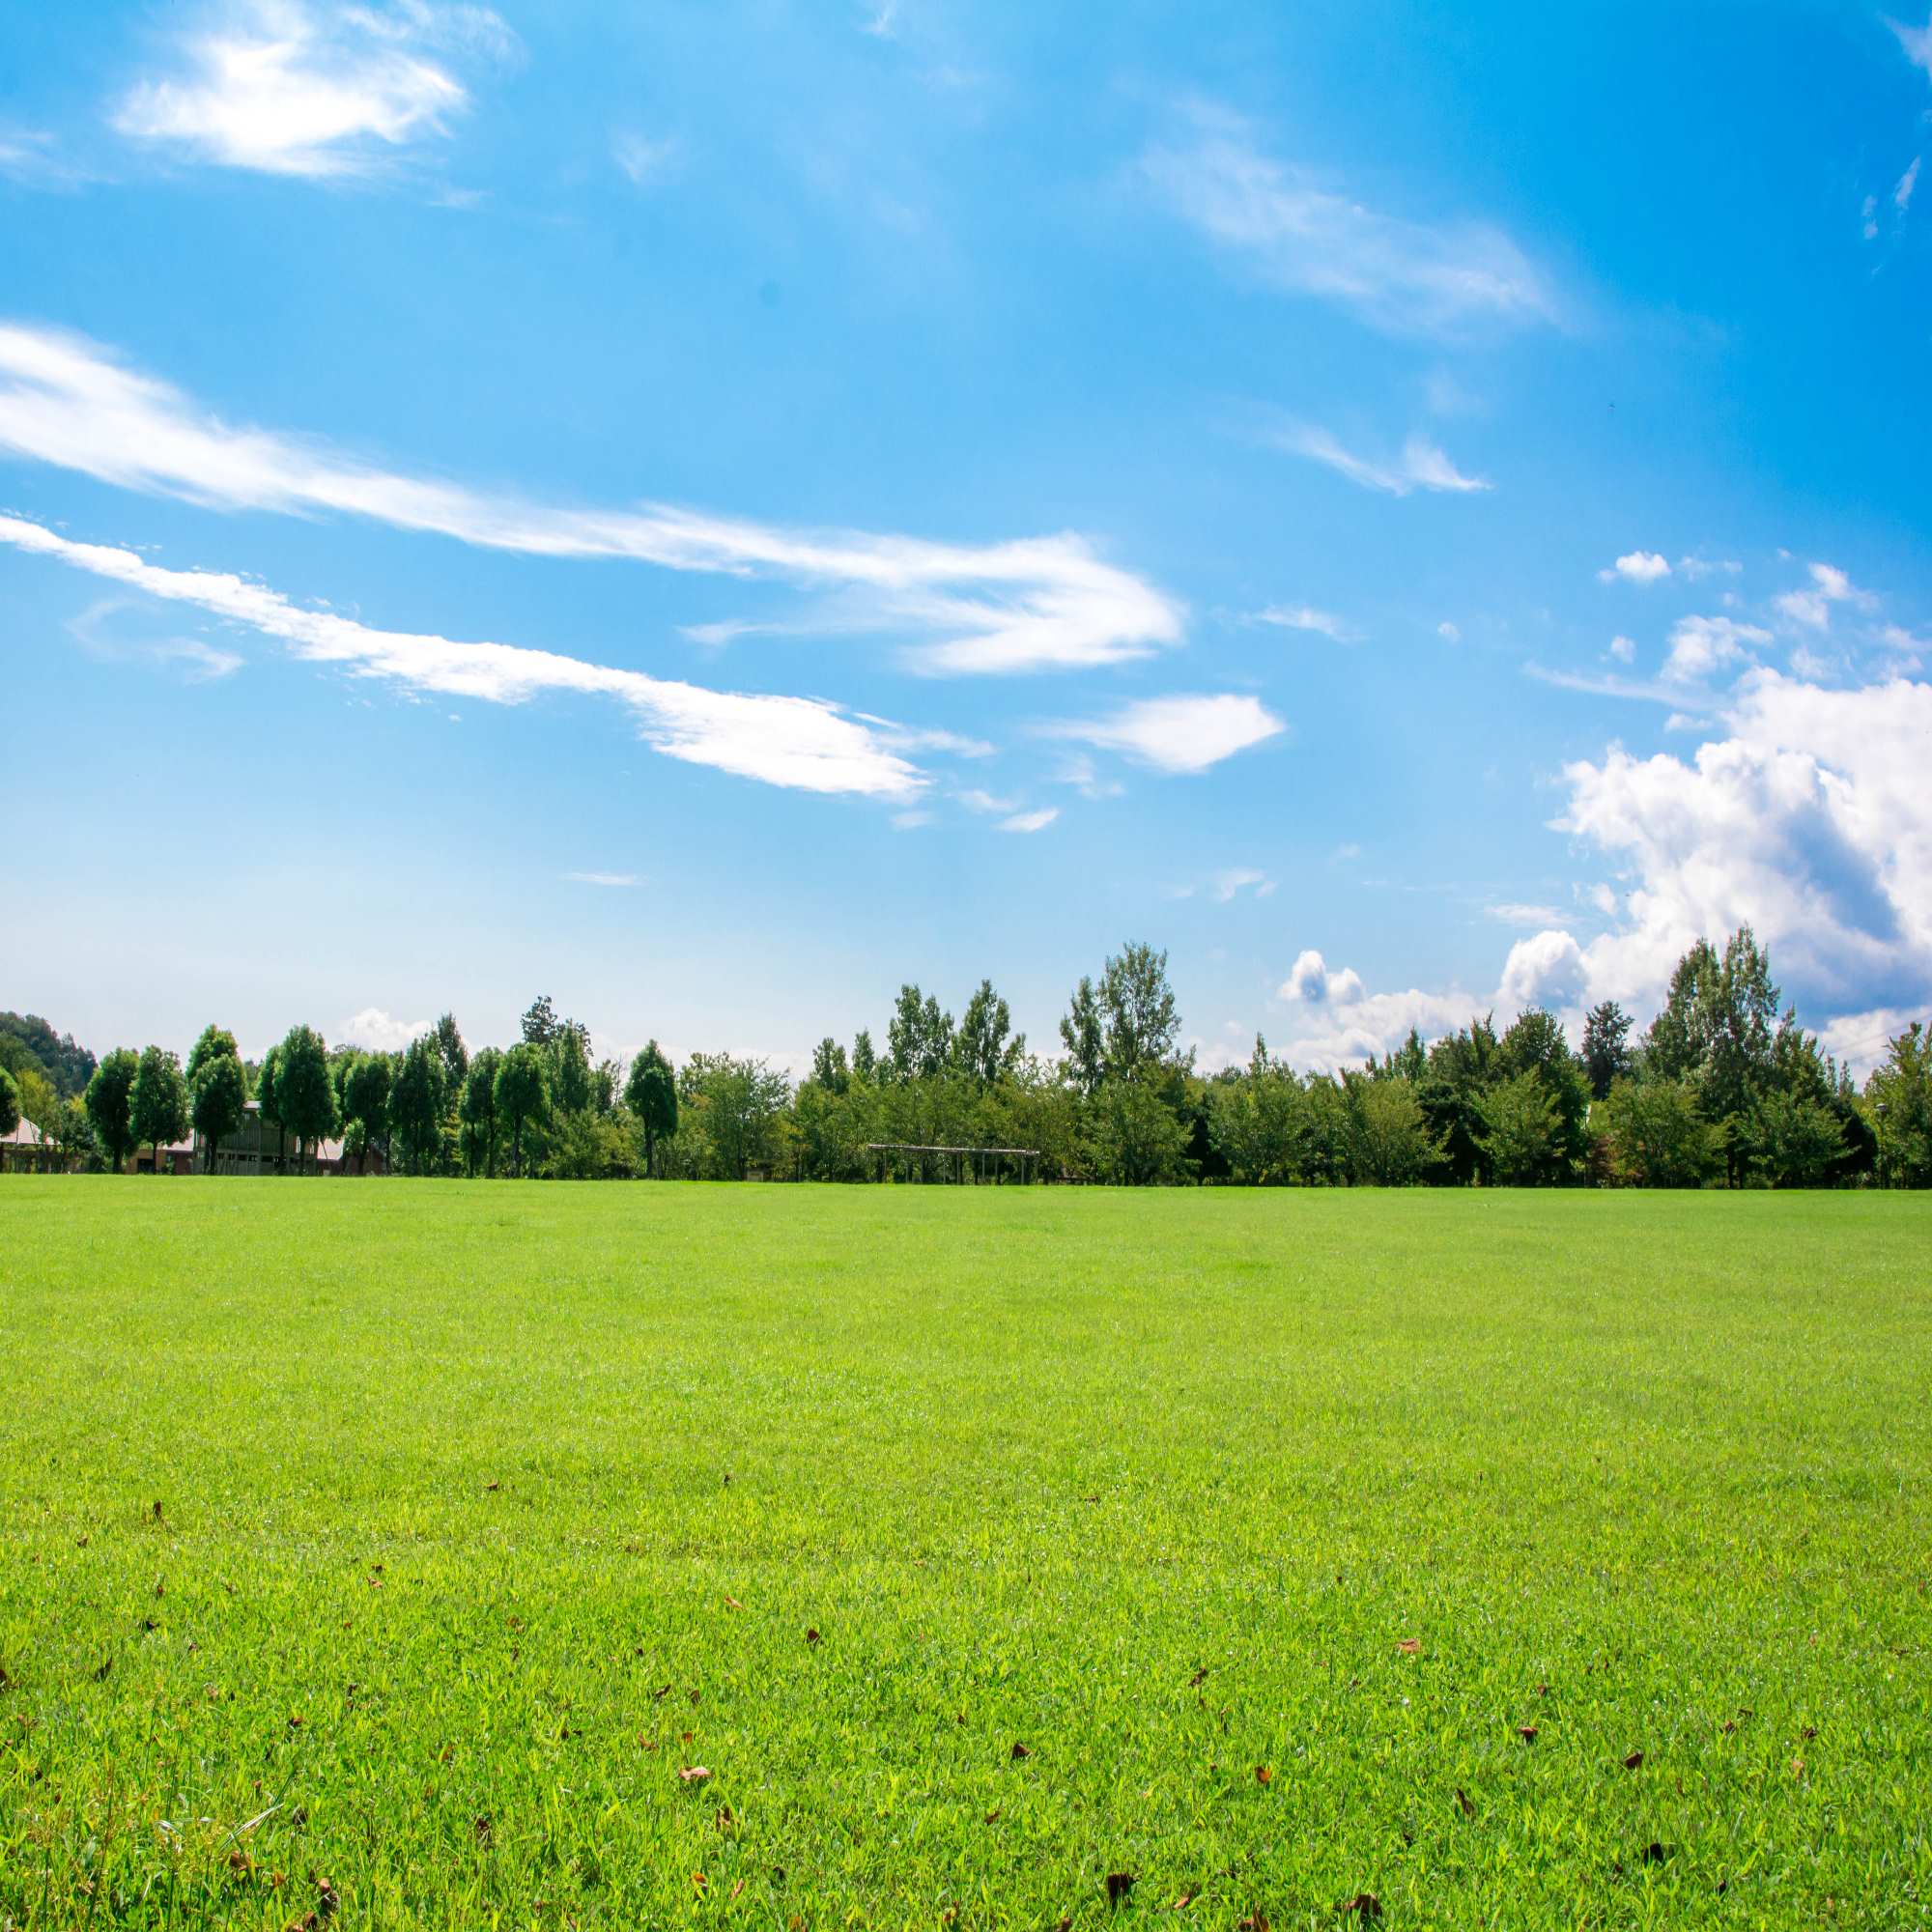
The last step before we actually shoot is to find a decent location. We could talk endlessly about this subject (as I’ve done in the past), but let’s keep it simple this time. Just think of the closest patch of grass or bitumen near your place that is really open and has good light at dusk.
It could be the local park. A soccer field. An empty car park. Any big space that lets you place the bike in the middle of it while keeping more than 50 metres (160 feet) between the surrounding trees, fences, walls, lights poles, benches, or what have you.
The more boring and empty, the better—you want the focus to be on the bike. Now check the weather report. Find the next sunny day and note down when the sun will be setting.
During The Shoot
It’s go-time; the shoot day has arrived. You have a clean bike, a camera with a fresh SD card, a cool location, and a clear sky. Here’s what you do:
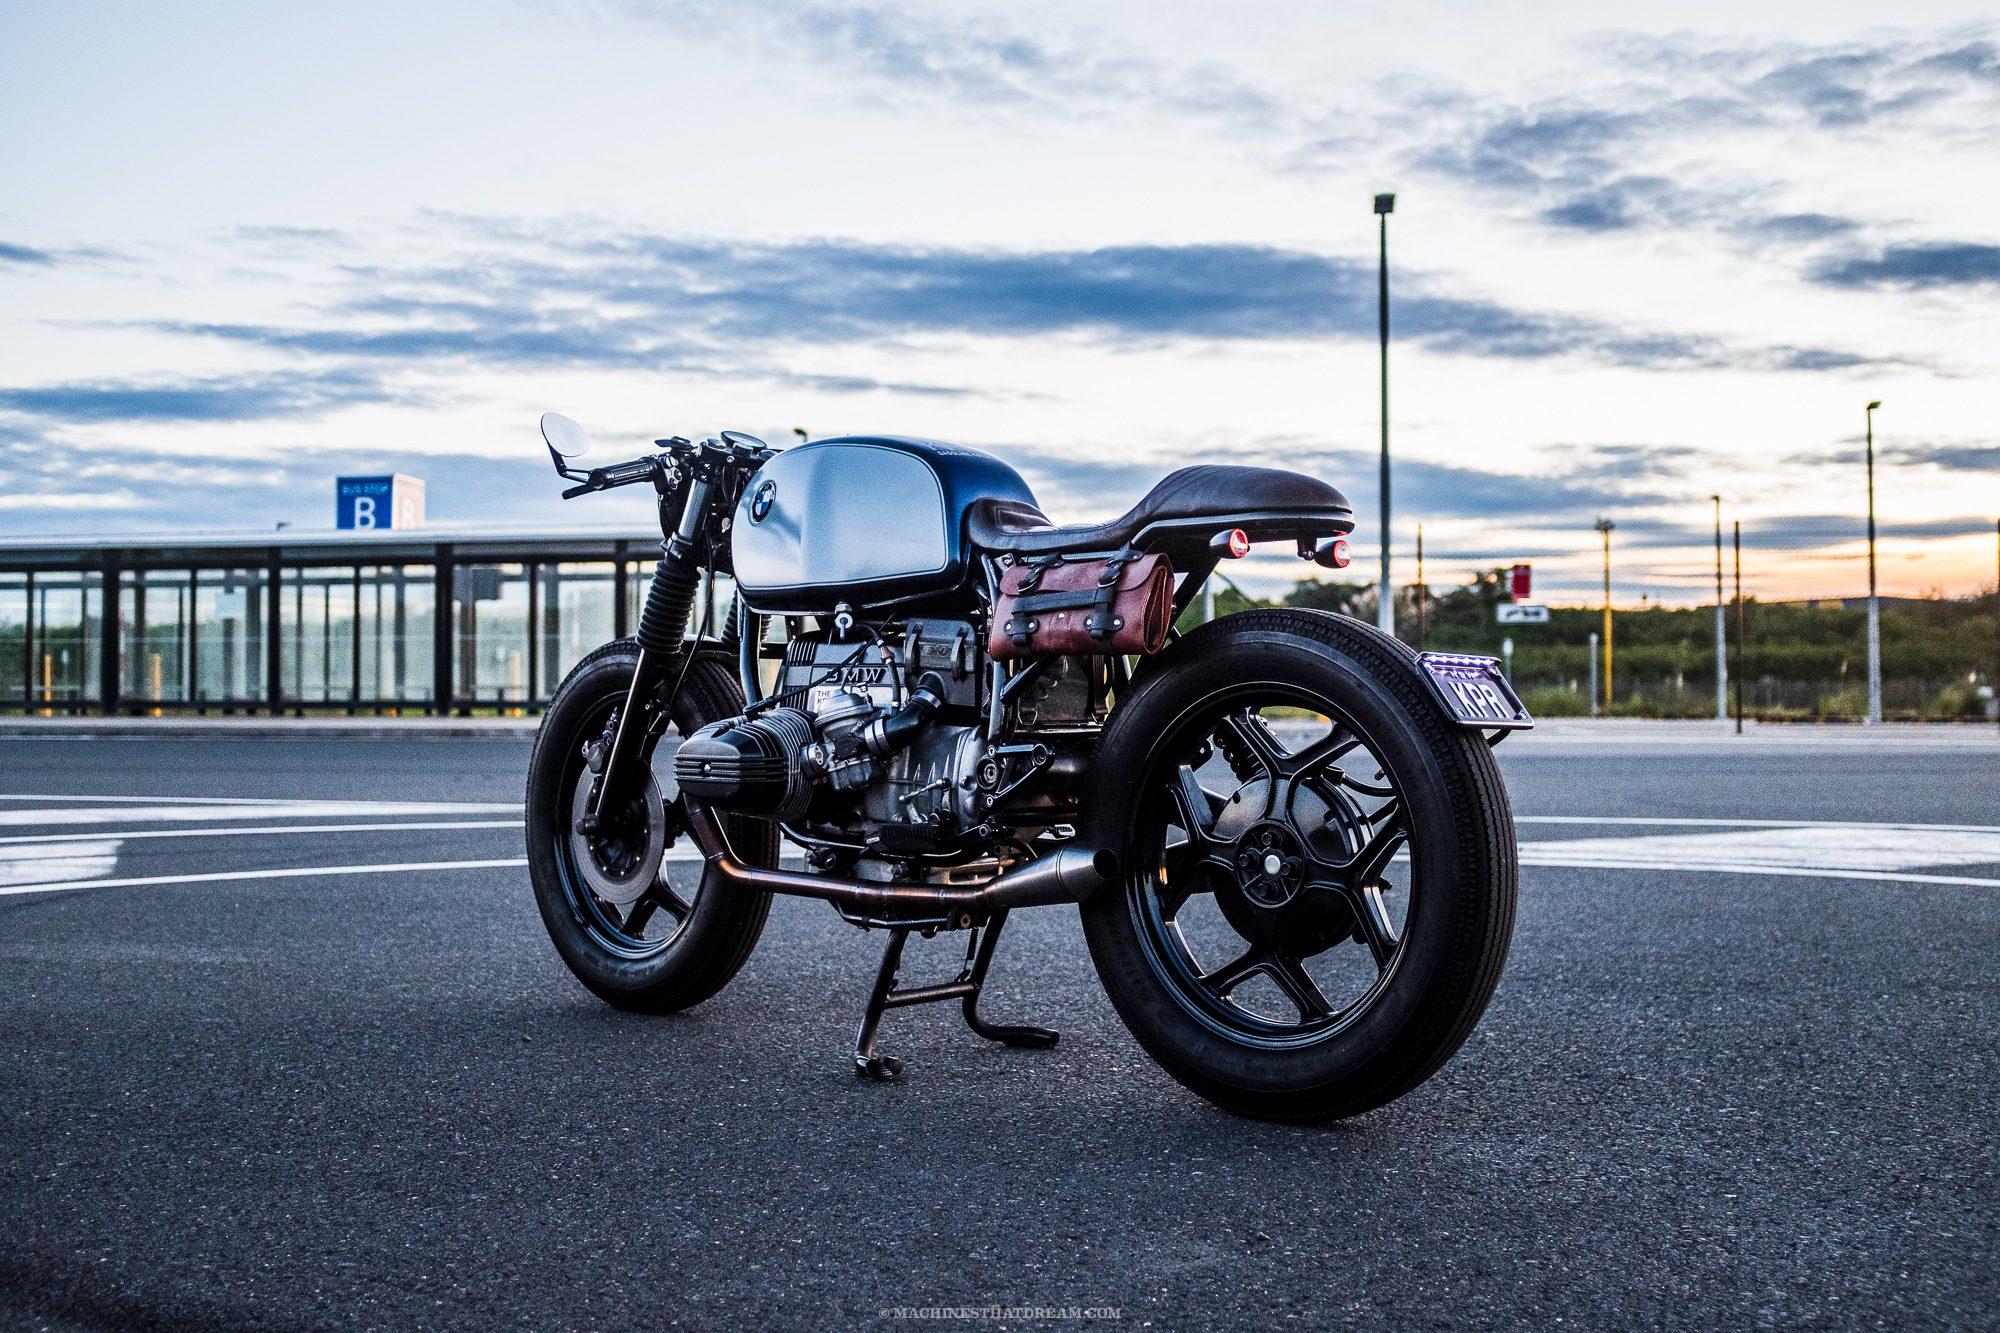
Rock up to the location with about 30 minutes to go before sunset. Position the bike in the chosen area with its exhaust side facing west towards the setting sun (so if your bike has the exhaust on its left side, like mine does, the bike will be facing north).
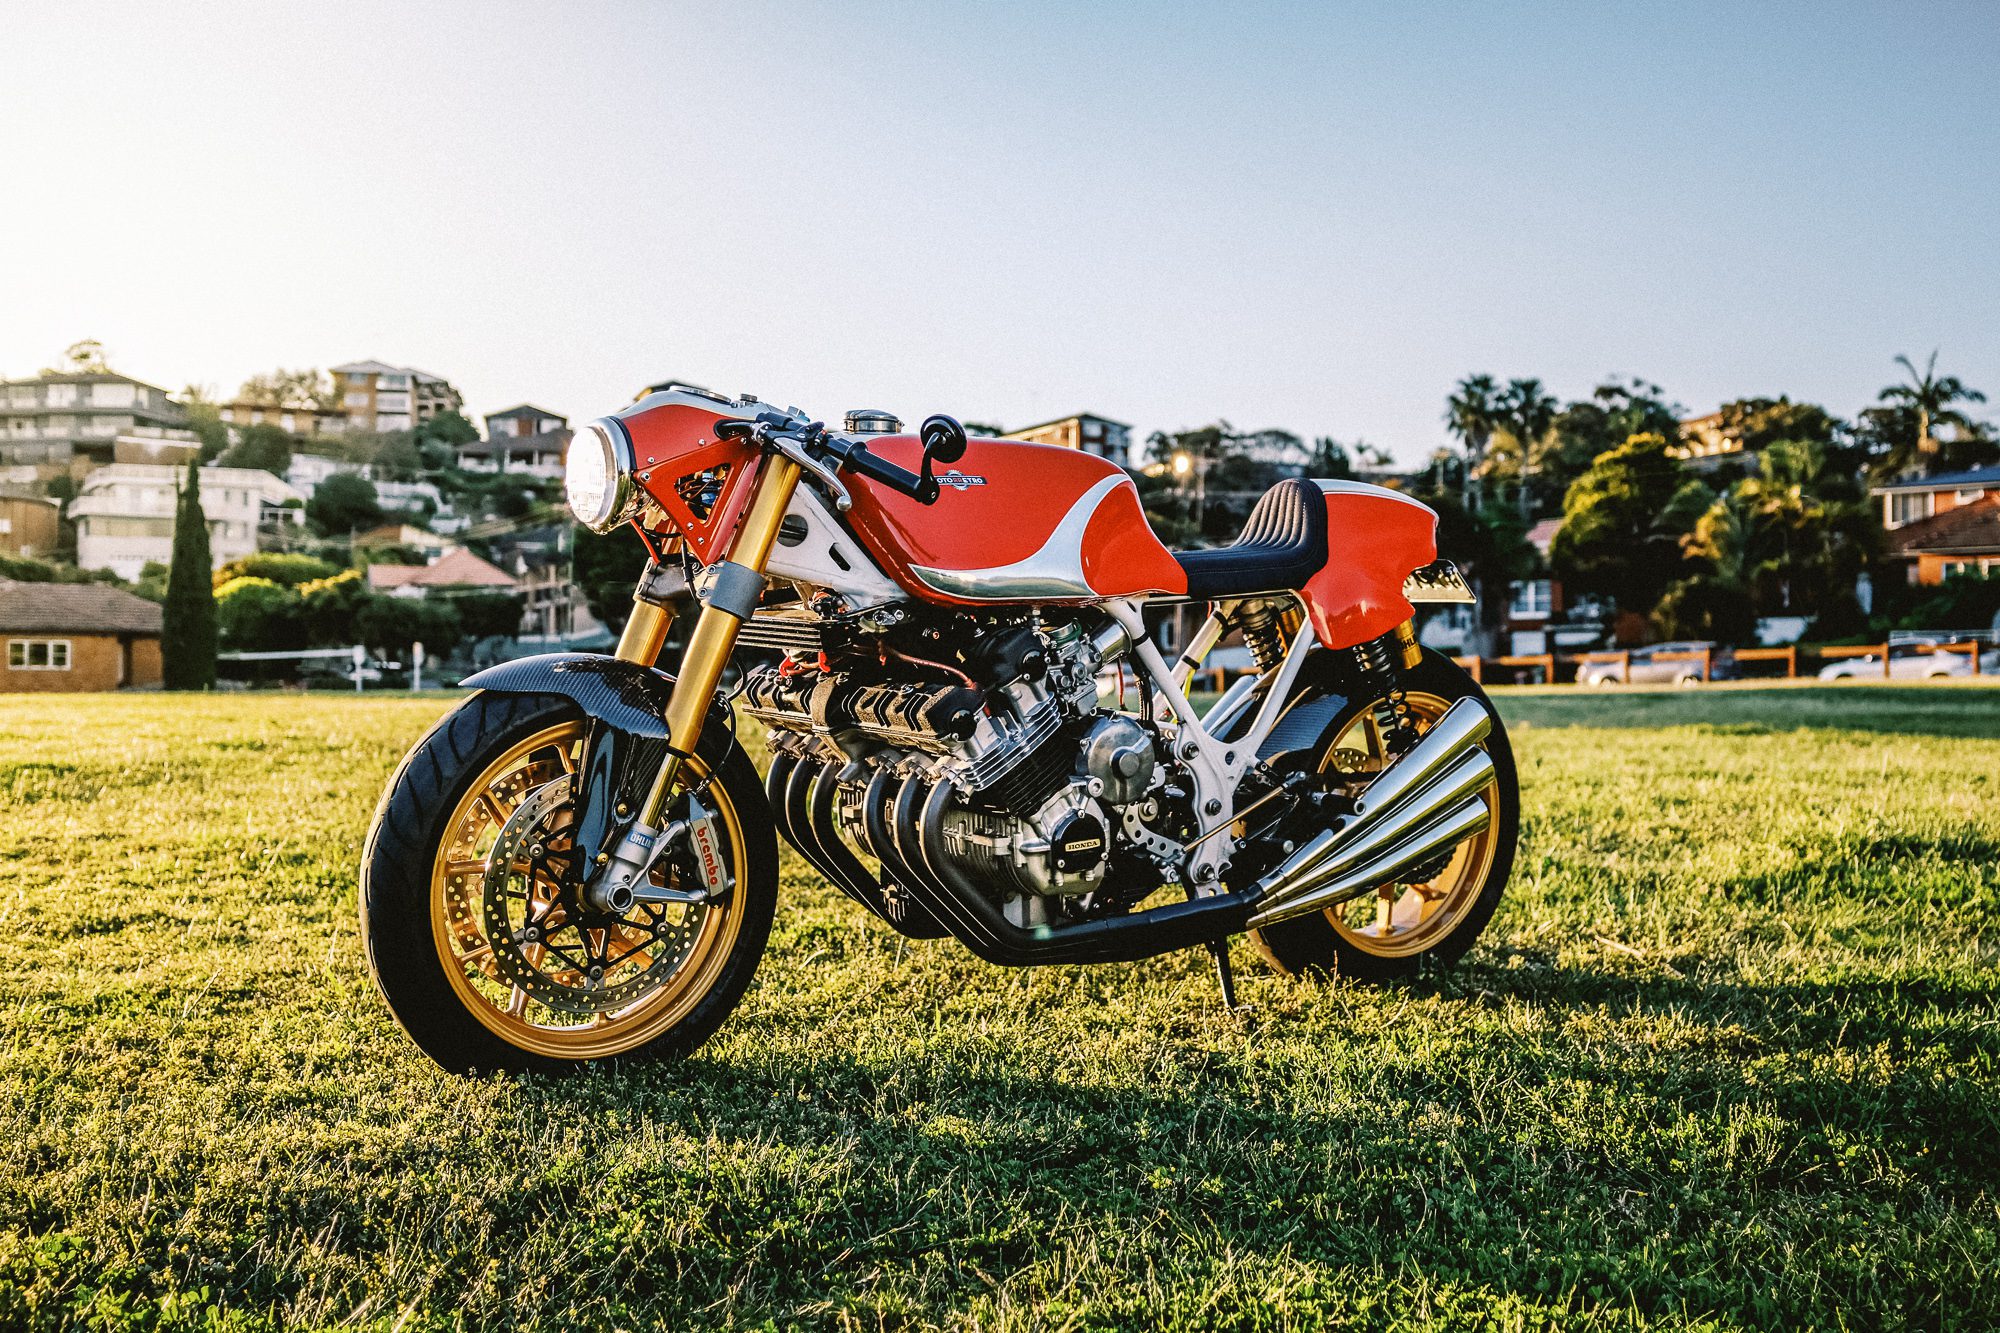
Now move away from the bike and look through the camera until the bike fills the camera’s viewfinder. Here’s an easy tip for framing things up: copy the approximate distance in the shots you see below. See how they aren’t too close or too far away? Try to do that.
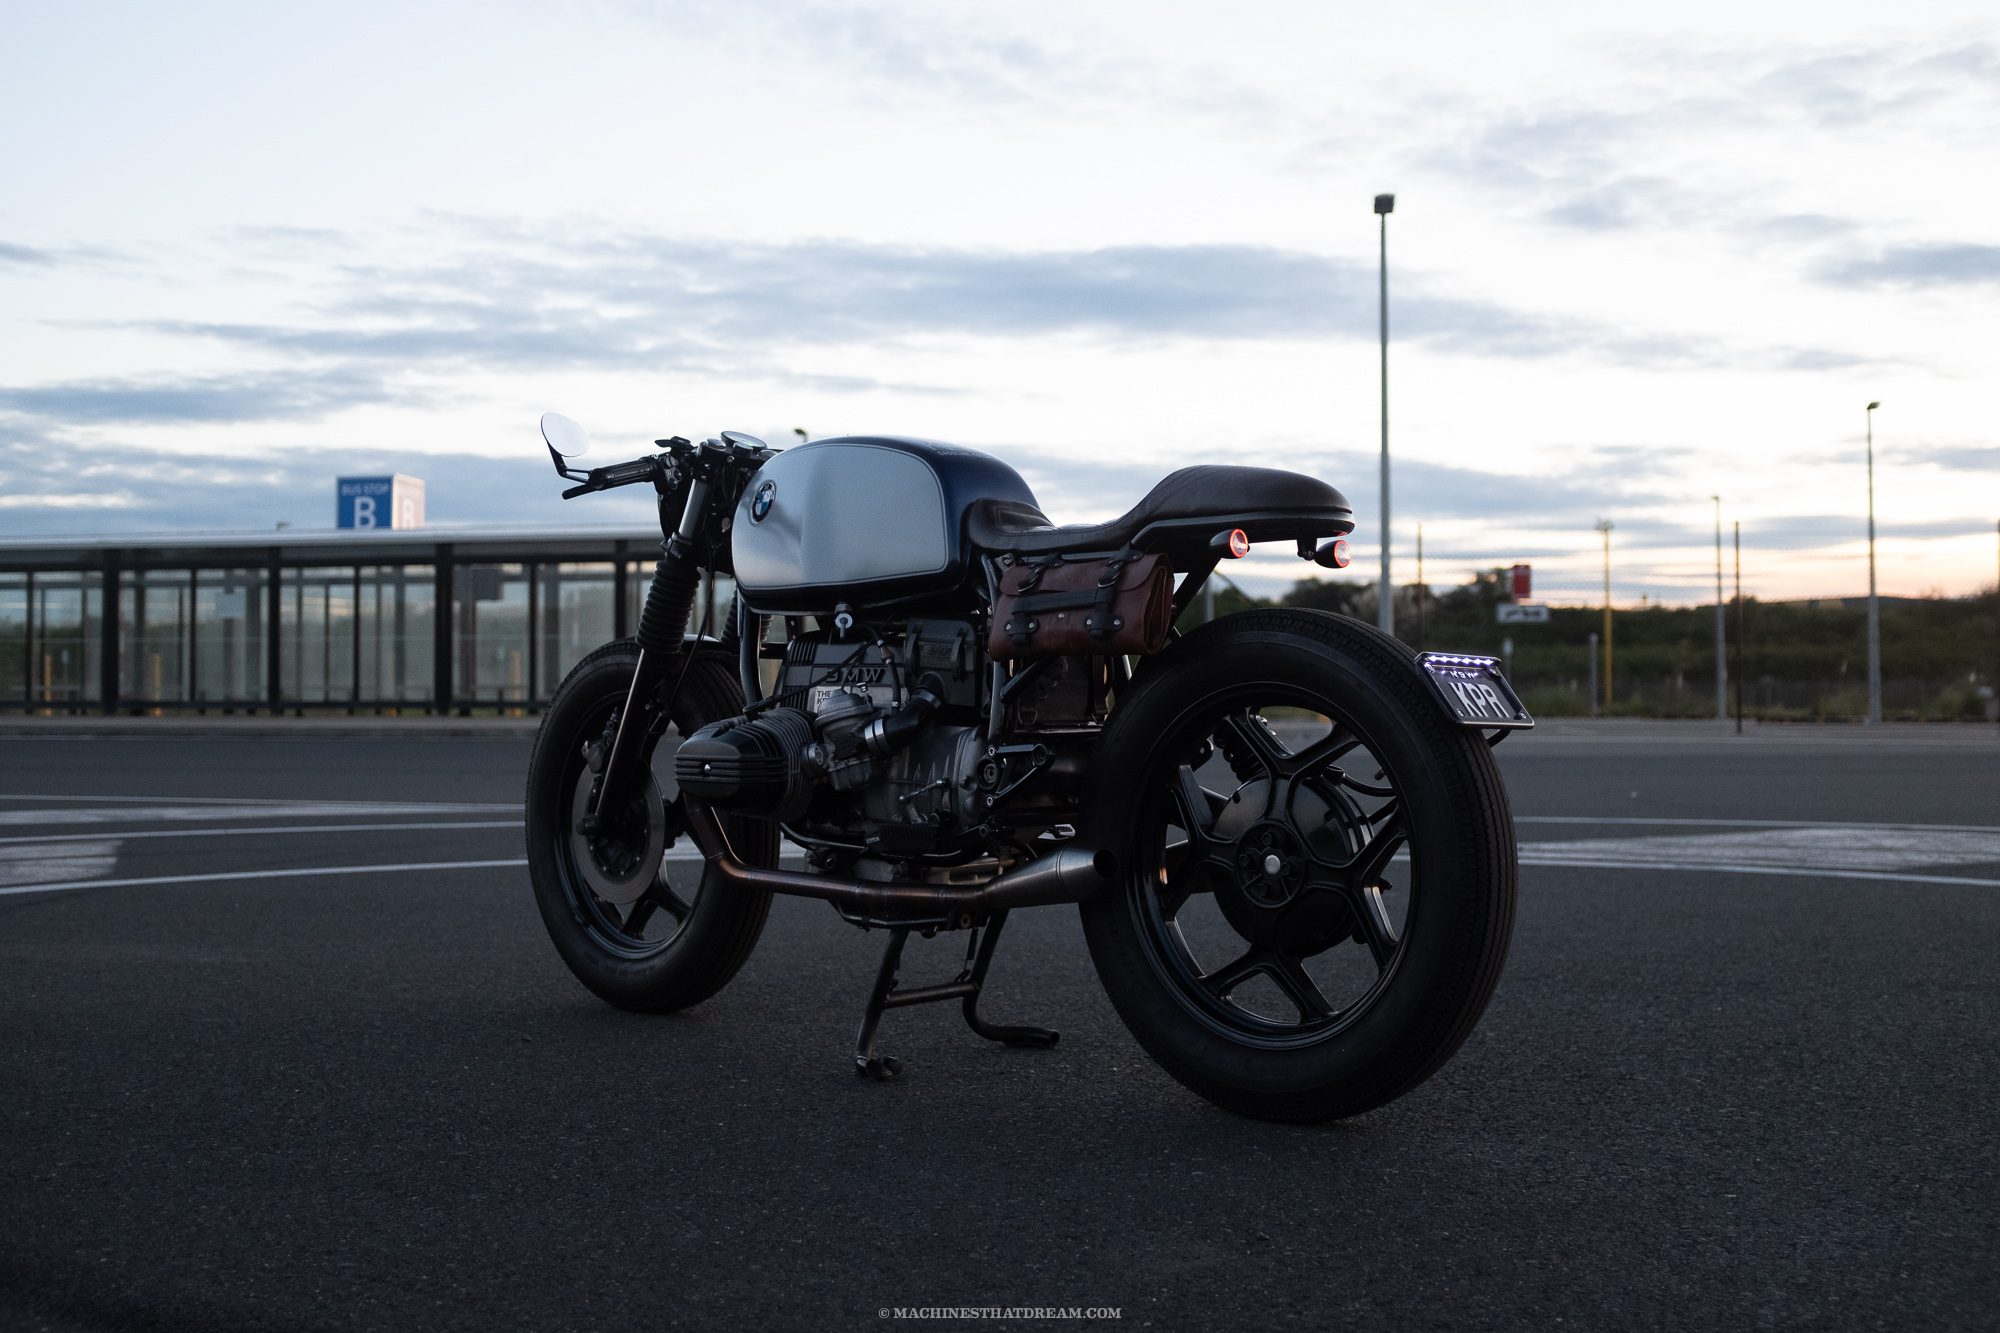
Now the rubber hits the road. Hold the camera about one metre (40 inches) off the ground so that the top of the bike’s tank is at or above the horizon line behind it and orbit around the bike, taking a shot every few steps. Maintain the bike’s dead-centre framing and surrounding spacing.
Make sure you get the bike square-on from each side and dead-on front and back. Do this for 30 minutes before the sun sets and 15 minutes after the sun sets, while regularly checking the shots.
Remember, there’s no such thing as too many photos with digital photography. I regularly take 750 photos in a single session for one bike in one location; it’ll improve your chances of getting that one killer shot. Just remember that RAW images will burn through SD cards, so make sure you have enough space.
You should be getting something very similar to what you see above; they will be kind of grey and flat with the bike looking dark but with some nice cloud detail in the sky. That’s what you want.
Grading The Shots
So now you’ve got a whole bunch of shots that aren’t particularly awesome. Calm down, my young photographical friends. We’re not quite finished yet, and this is where all the magic happens.
Go ahead and download a copy of Adobe Lightroom Classic. Yes it will cost you—and yes, I did say earlier that it wouldn’t. But here’s the deal; if you cancel anytime before the two-week mark after you purchase it you’ll get a full refund from Adobe.
No, this isn’t an ad for them, but I do like and use Lightroom almost every day. And once you see the results on your own shots, I’m pretty sure you’ll want more. If not, then just cancel the subscription—in fact, go ahead and set yourself a reminder on your phone to make sure you don’t forget.
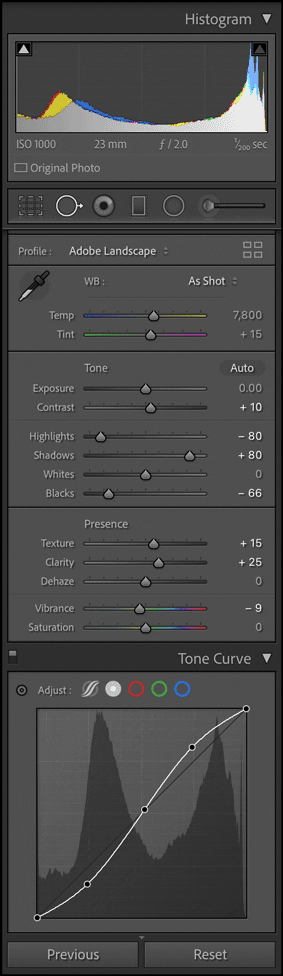
Now that you have the software ready to go, import the RAW files you took of your bike and ‘develop’ them with the Lightroom settings shown above. If you’re struggling with the basics of how to import and adjust the photos, just consult the YouTube Oracle as always.
Take note that the profile is set to ‘Adobe Landscape’ in the third box down. In the fourth box down, the WB (White Balance) will depend entirely on your camera and shooting conditions, but I’d suggest adding about 500 yellow here to the ‘As Shot’ settings (by dragging the Temp slider to the right) and also about 10 magenta (by doing the same with the Tint slider). Do not use the ‘Auto’ Tone button.
All the other sliders should be set as shown. For the Tone Curve, you’ll need to create an ‘S-curve’ as shown here. By default, this will be a straight, 45 degree line. To get it like I have it, just add ‘handles’ at the 25 and 75% points and then drag them to get something similar. Notice below how the bike now pops and all the shadows have detail in them? Bingo.
One final point. See the spiky graph at the very top of the Lightroom interface where it says ‘Histogram’? This should have a generally even spread of spikes on the left- and right-hand sides. If it has a whole bunch on one side and not the other, you’ll need to adjust your exposure.
Drag the exposure slider left and right until the graph is more balanced. Now your shot should look something like the one above. If it’s not working and you’re pulling your hair out, try this.
Printing Your Badass Bike Photos
After all that brain work, I’m gonna keep the printing part easy. Export the finished photo out of Lightroom as a high-quality TIFF file that’s at least 10 megabytes.
Next, you’ll have three main printing options. Firstly (and most cheaply), you can just take the file on a usb stick to your local Staples/Officeworld/Officeworks, etc.
Most of these places will have themselves a large format printer you can use to get big prints of your photo made. My local one is surprisingly cheap and good. Your mileage may vary, but I was getting prints as tall as myself on a classy matte paper for $30 or so. Then just pin the shot to your wall. Easy.
Your second option is an online photo service. Again, the specifics may vary from country to country, but if you just Google ‘Online Photo Framing Service’ you’ll find a whole bunch.
The basics are pretty simple: you use their website to upload your photo and choose some framing options, enter your credit card details, and then presto change-o—a week or two later, they deliver the finished product to your front door.
I’ve had some very cool results with these kinds of services; they usually turn out a lot better than you’d imagine because they want you to be impressed with their service and make repeat orders. Expect to pay $100 to $200 a pop.
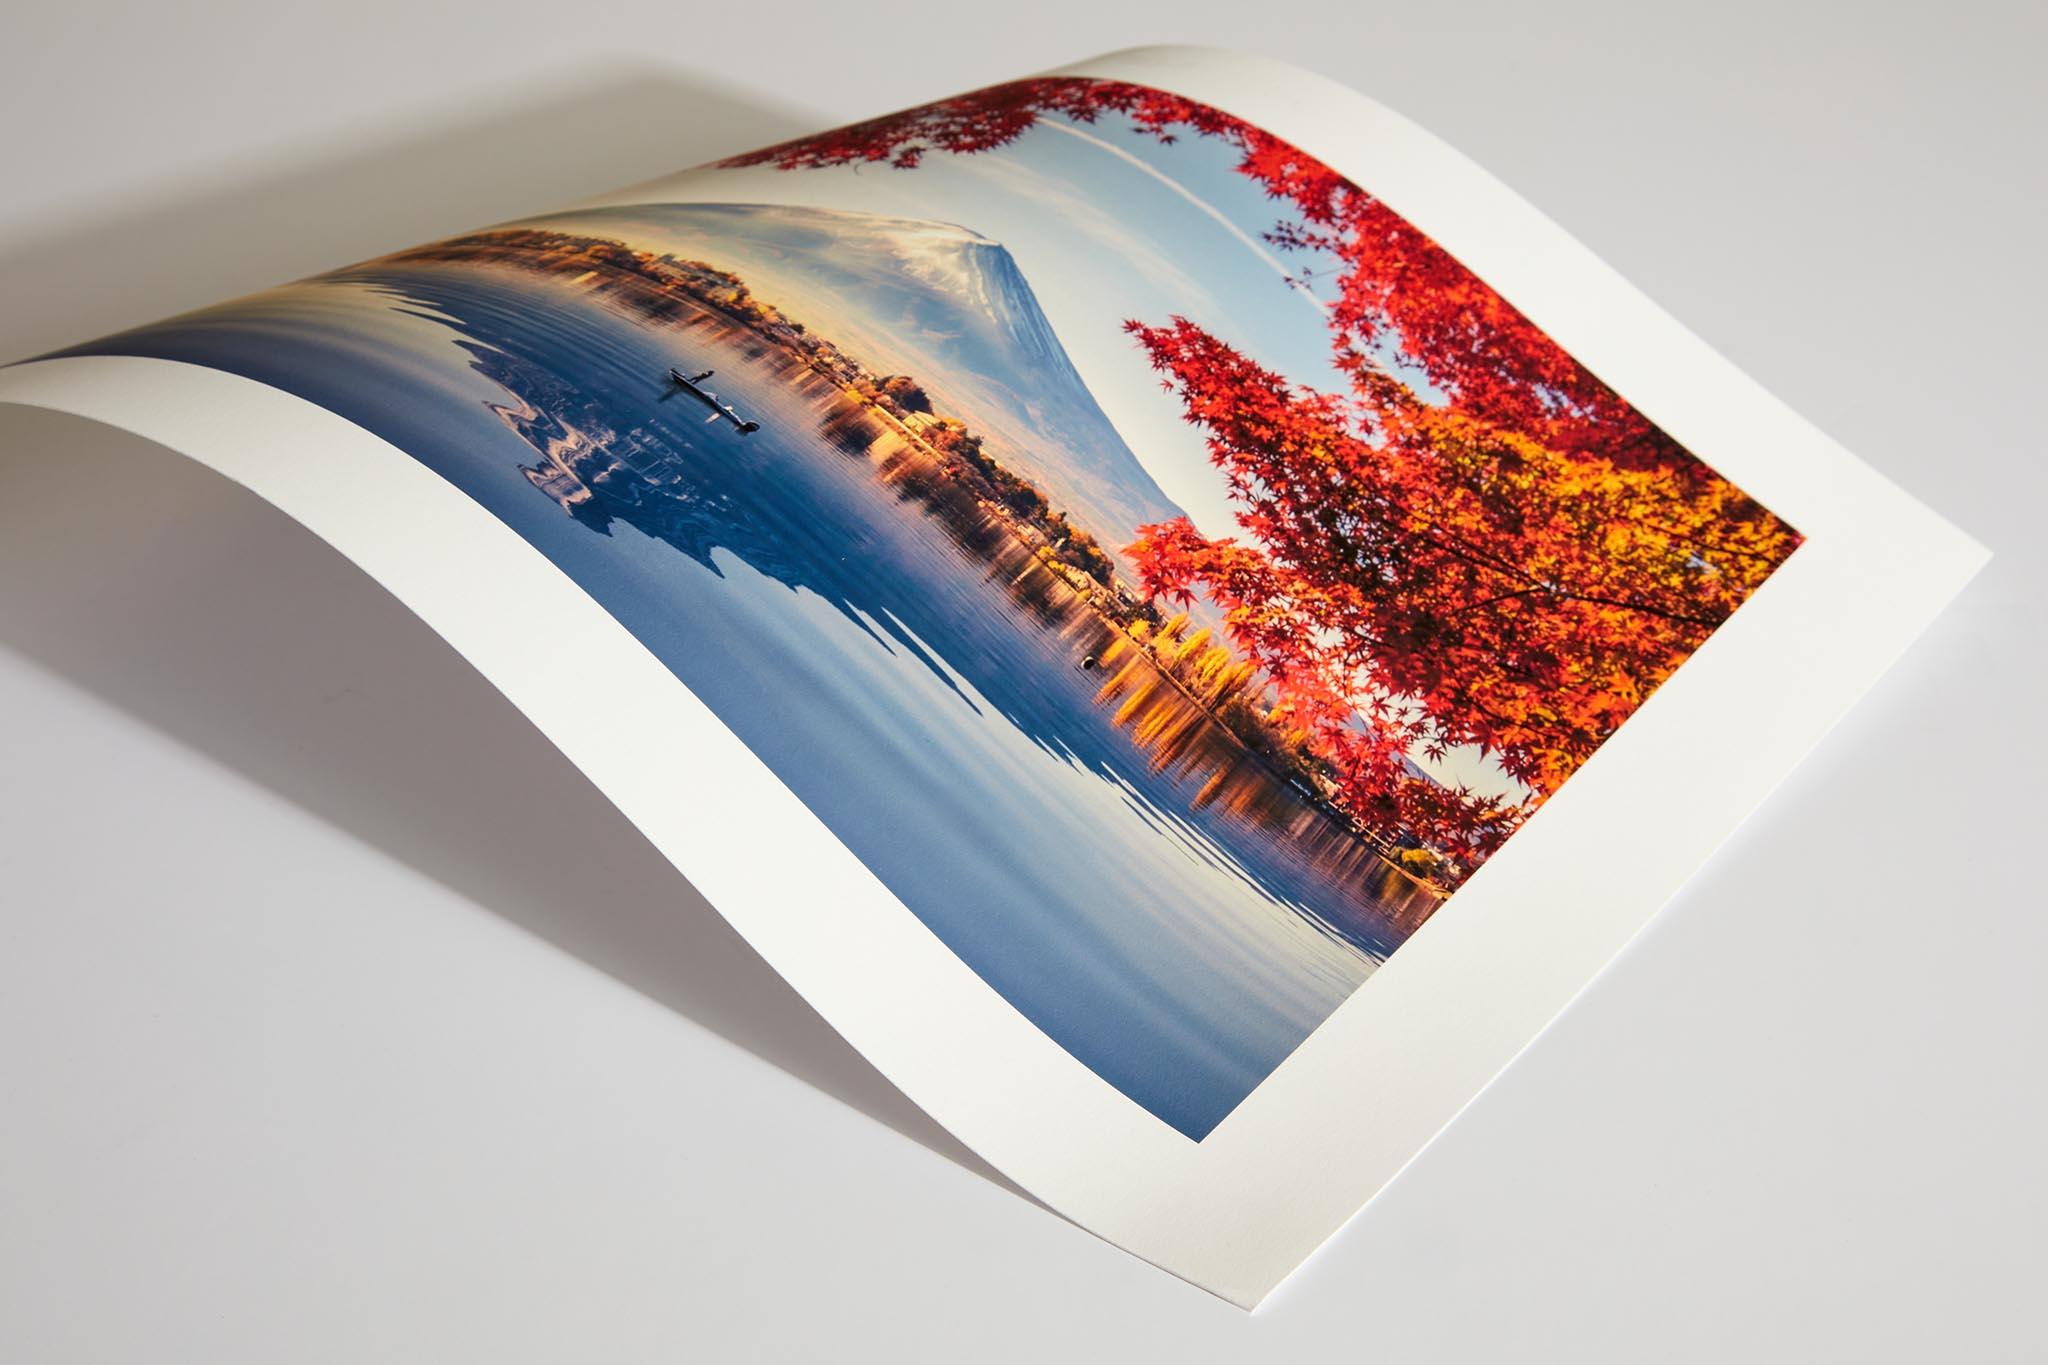
The third and most expensive option is also going to provide the best results—but as with most worthwhile things in life, it won’t be cheap. What you want to do is to go back to Google and search up your local ‘giclee printer’ (pronounced ‘she-clay’ with a pretentious French accent) and give them a call. This type of printing is used for fine art prints and it looks like heaven on paper (seriously, it’s that good—and surprisingly, it’s not all that expensive).
When you take that print to your local framers for the mounting and surrounds, your costs will go up. Expect to pay north of $200 for anything decent. But think about it like this: what price would you pay for a genuinely amazing shot of your own beautiful bike that you yourself shot, graded, and had framed? Did someone say ‘bucket list’?